One-Weekend DIY Projects to Get Your House Relative-Ready for the Holidays

22758447_original(BPT) – When the holidays arrive, you can prepare a scrumptious feast, present ideal gifts that are perfectly wrapped and decorate the house like something off a magazine cover. However, your mother-in-law is still going to focus on the stained upholstery in the family room, the tacky and dated wallpaper in the dining room, and the guest bedroom carpet that looks older than she is.

This year, you can spare yourself the in-law-inflicted shame with some budget-friendly do-it-yourself projects that will take just a weekend (or less) to achieve. Your home will be holiday ready, and as a bonus, you’ll get to enjoy the improvements throughout the New Year.

Before you begin, remember: you can save time, money and storage space by renting the tools you need for holiday DIY projects. Renting means you always have access to the items you need, and when your project is done, cleanup is as easy as returning the items to your local rental store. To find a rental store near you, visit rentalHQ.com.


Easy, High-Impact Projects

First, focus your efforts on high-traffic rooms where guests will spend the most time. For example, tackle improvements in the kitchen, living room and guest bath, but skip projects in less trafficked areas like your master bedroom. Next, pick projects that are fast, easy and low cost, but will have high impact.

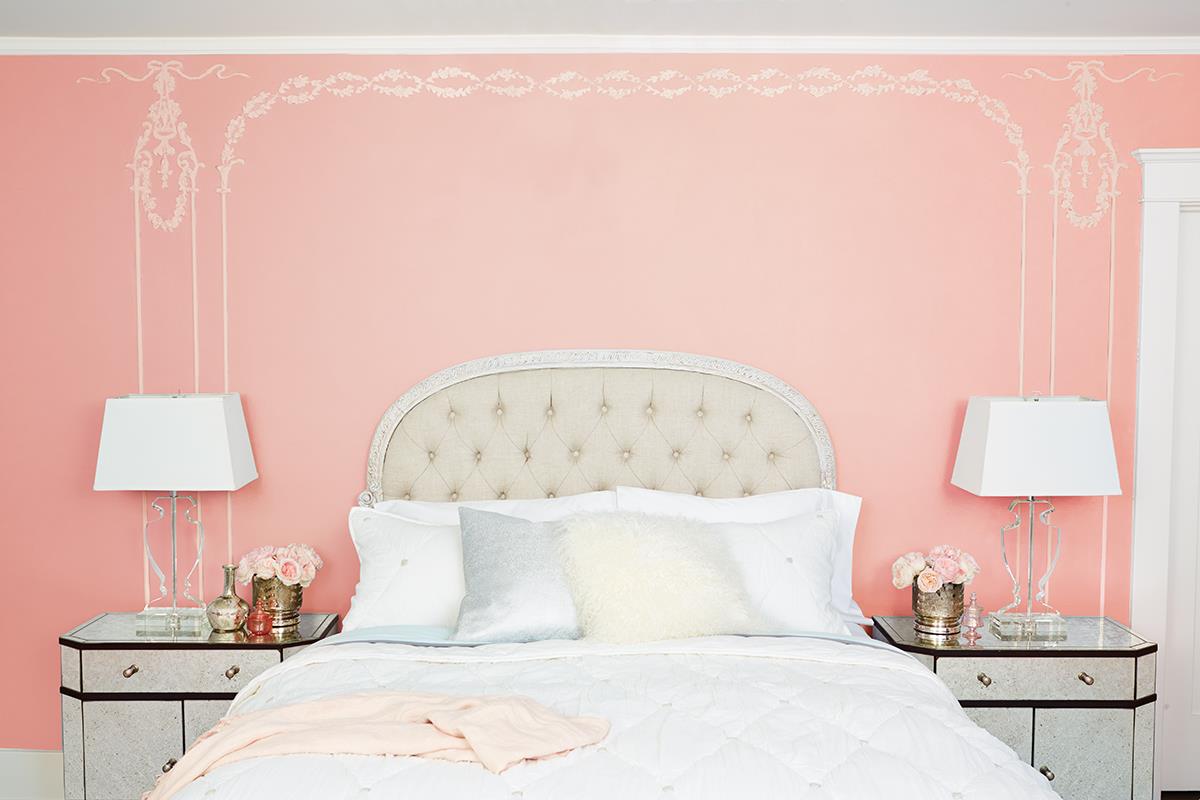
You’ve undoubtedly heard it before, but it’s worth saying again – paint, paint, paint! Repainting a room is one of the fastest, easiest and most cost-effective ways to make it look better. Most rooms can easily be painted in a day or less, even if you’re going all-out and doing the ceiling and trim as well as the walls. Score bonus points by using a rented texture sprayer to add a unique, professional look to walls.

Speaking of paint, a fresh coat in an eye-catching color can make your front door look new and inviting. While you’re working on your entryway, remember to power-wash sidewalks, steps and trim, and wash sidelights, transoms and other windows near the door. A polished entryway will make your holiday decorations look even better – and wow the in-laws before they even ring the doorbell.

22758567_original
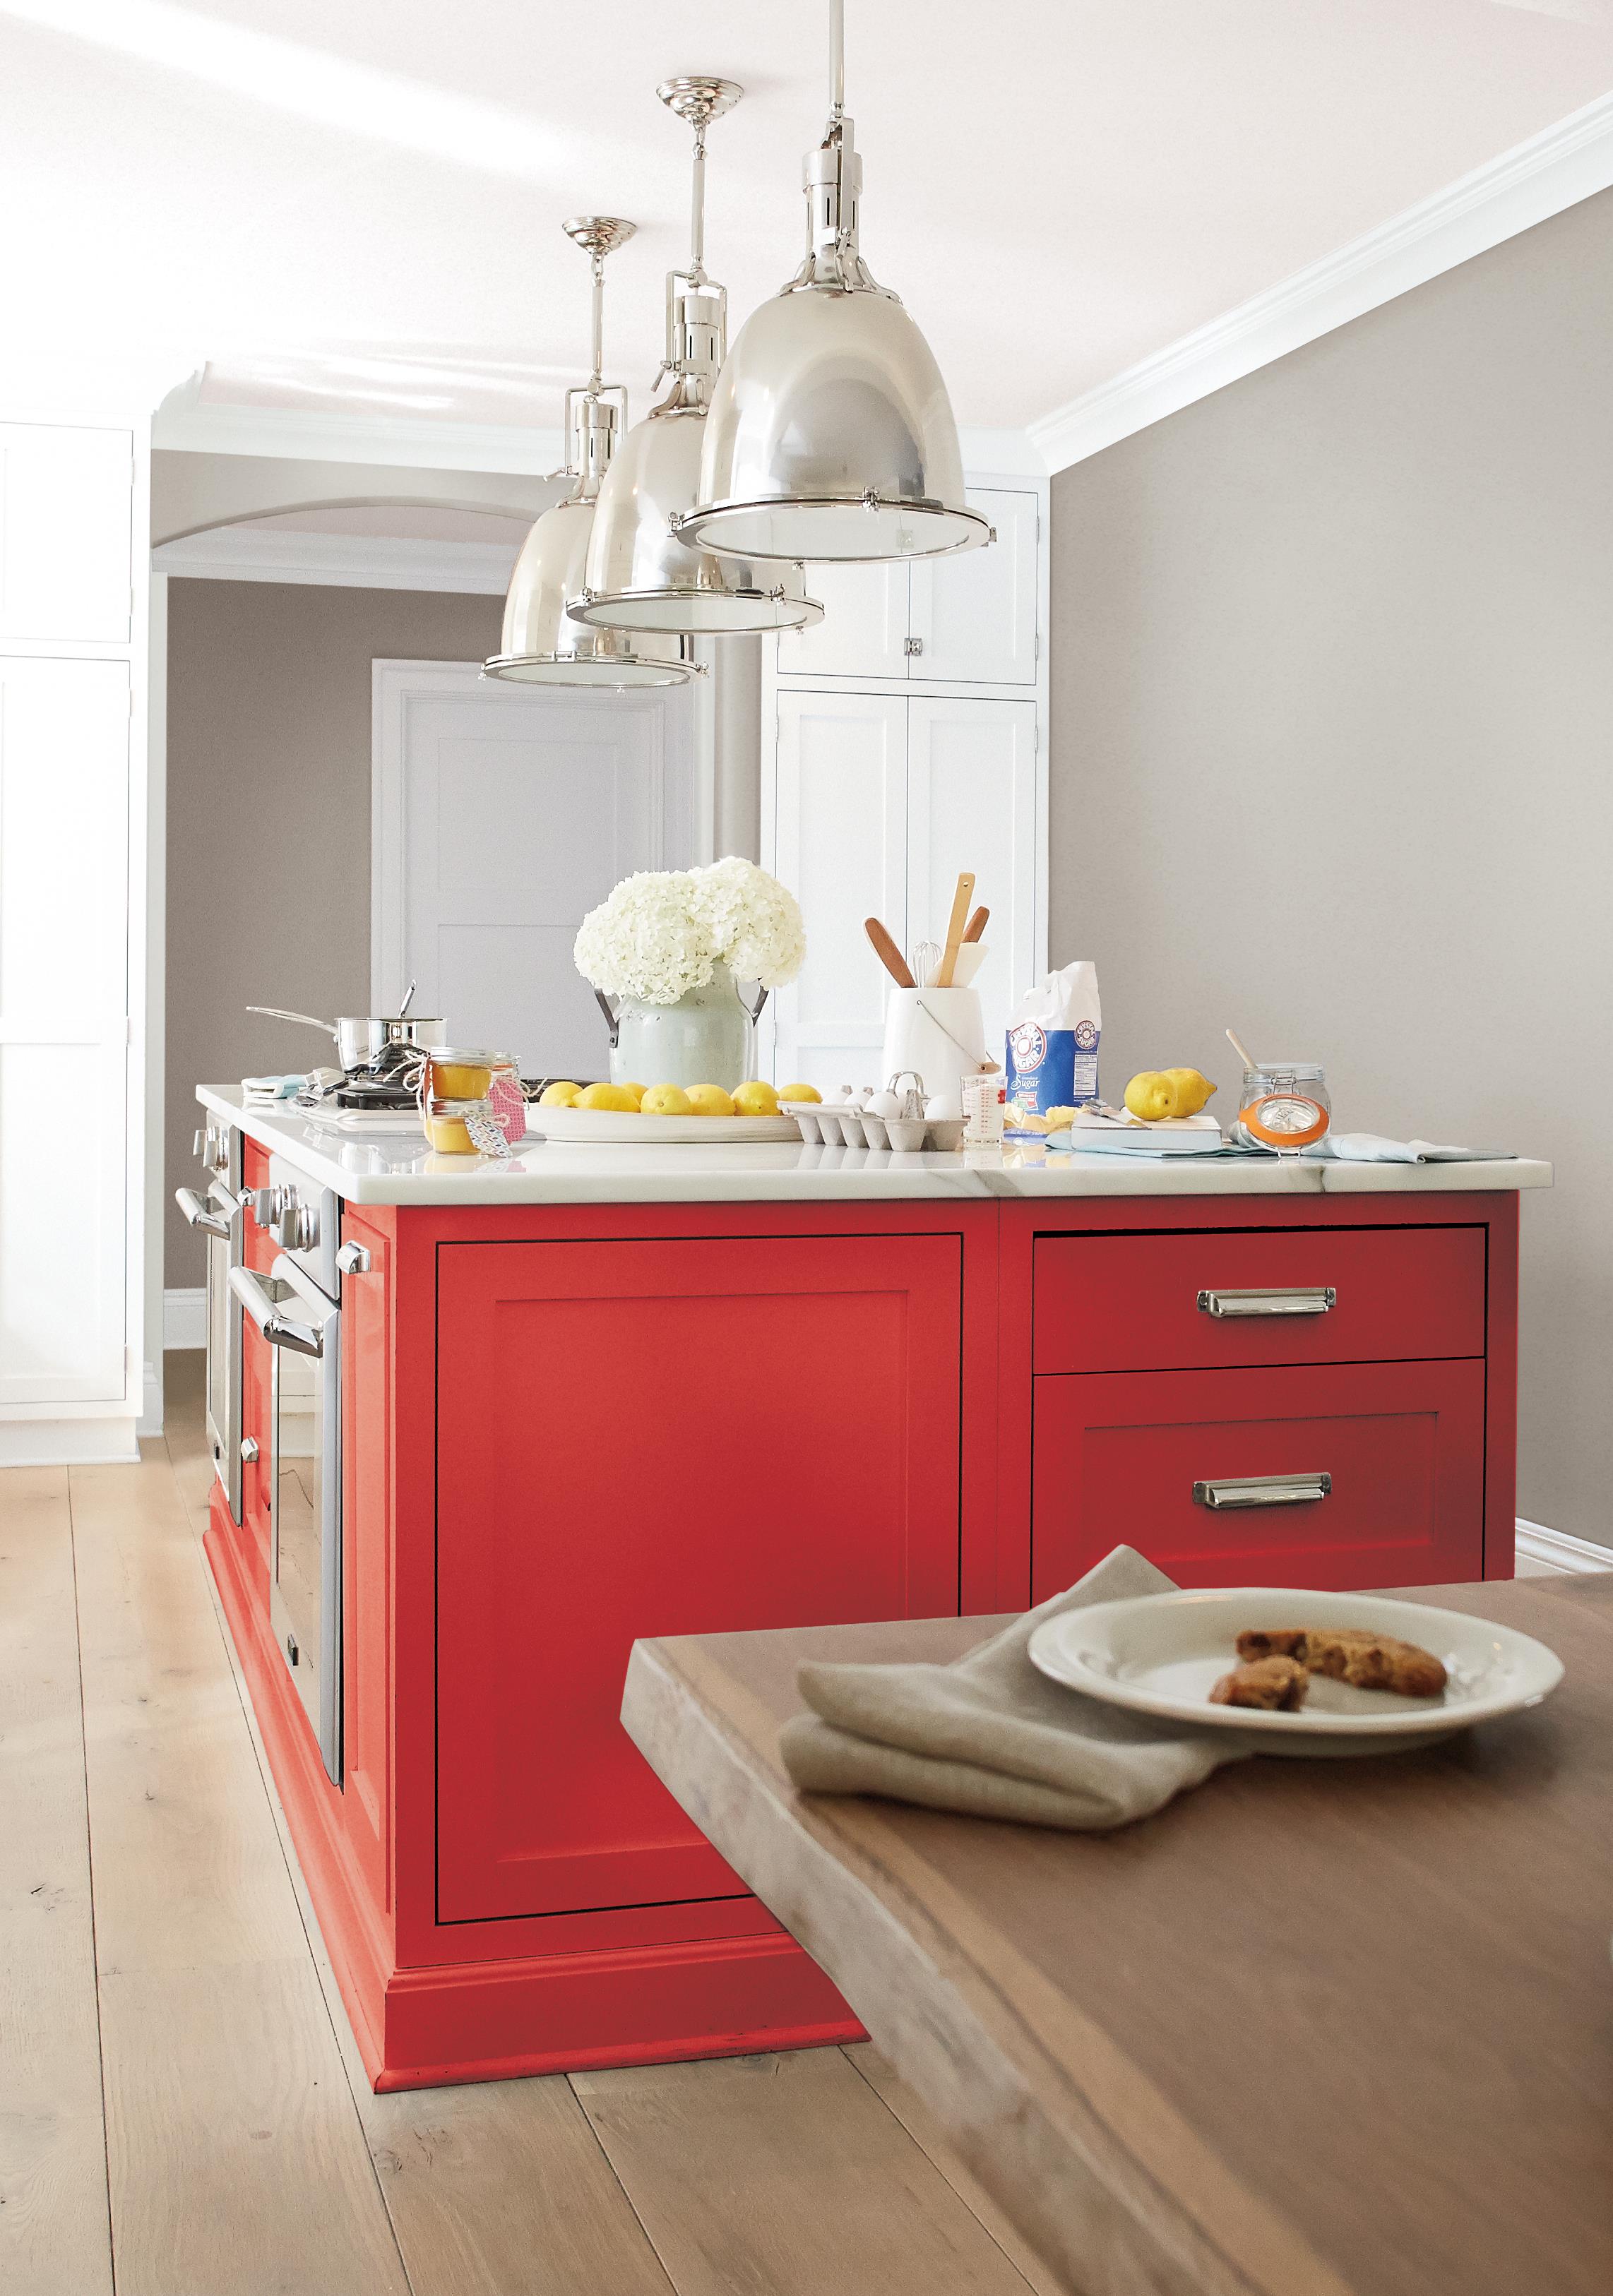
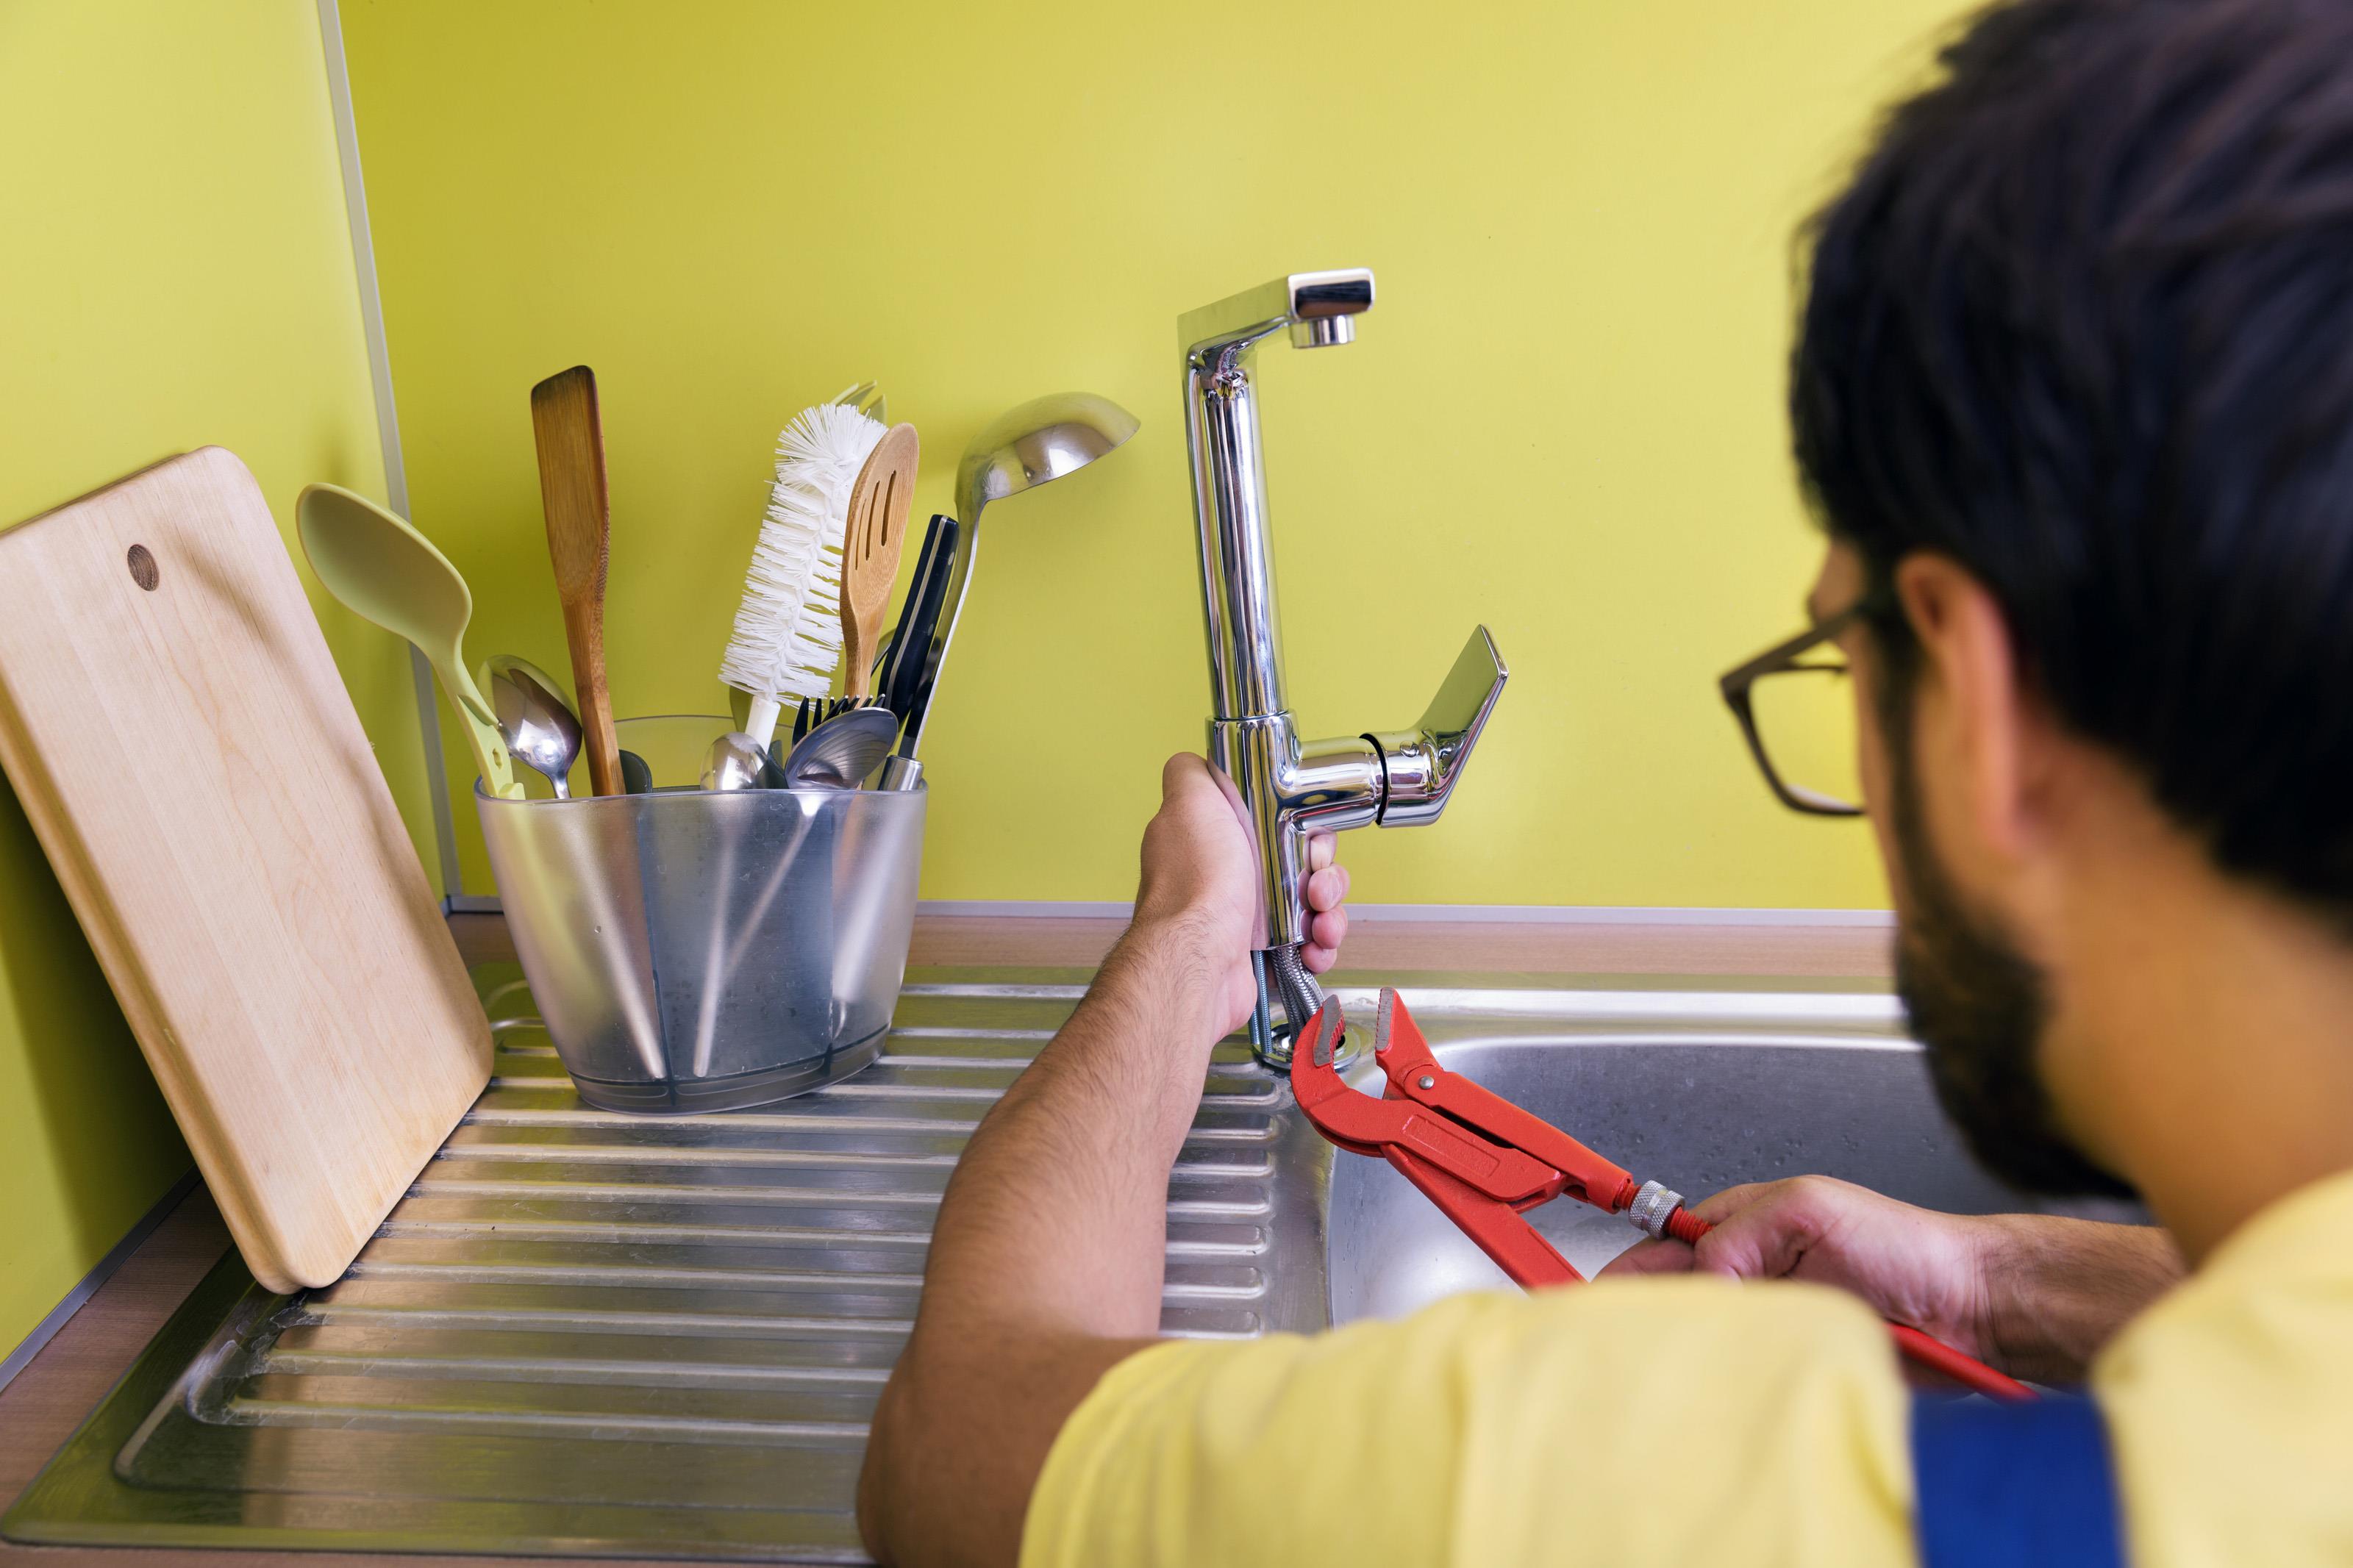
In kitchens and bathrooms, replace dated or worn faucets. Install a new showerhead in the bathroom, and add a new shower curtain. A new light fixture in the dining room can brighten the space and enhance the festive atmosphere. Rent a steam cleaner to freshen up tile floors, carpet and upholstery. Score bonus points with your scent-sensitive in-laws for using a cleaning method that’s hypoallergenic and chemical-free!


A Little More Effort

Some projects may take a little more effort, but their payoff can be even higher. For example, remove that tired dining room wallpaper or 80’s-style wallpaper border in the powder room with a rented wallpaper steamer. The steamer will make the job easy as possible and that little extra investment of time will give you a fresh, blank slate for updating the room’s décor.

Adding molding to a dining room or family room creates an air of quiet elegance. Whether you opt to add crown molding at the ceiling or decorative molding and wainscoting on the walls, you can rent the measuring and cutting tools you’ll need to do the job well.

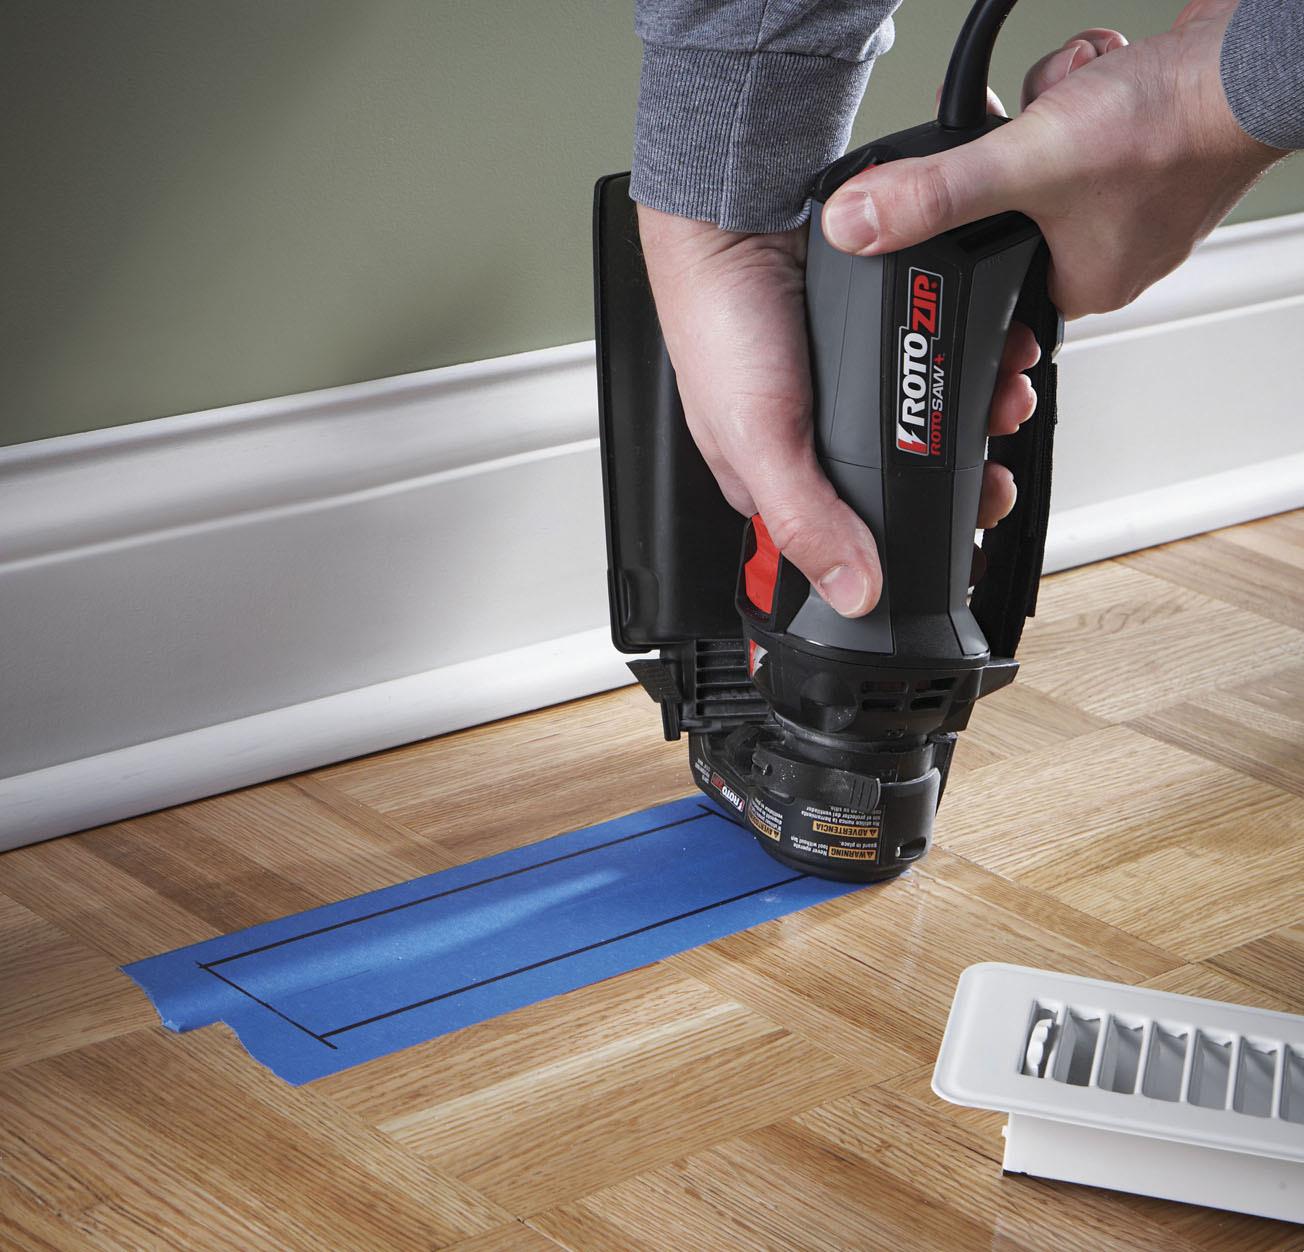
If you’re feeling ambitious and are eager for a project that will really knock the in-laws’ socks off, you can get rid of that old grungy carpet. Whether you choose to refurbish the wood floor under the old carpet, or install new carpeting, you can rent the tools you need, such as a floor sander or carpet stretching tool.

With the holidays approaching fast, you don’t have a lot of time or money for DIY projects that will impress the in-laws. Fortunately, you can accomplish some impressive results in a single weekend when you rent the tools you need. Visit www.rentalHQ.com to find a rental store near you.

You’re Free! Five Great Ideas for Repurposing Kids’ Bedrooms

29573572_original(BPT) – Now that your kids have launched lives of their own, you may be considering how to maximize the extra space they left behind.
Making renovations can be a fun way to turn their now-empty rooms into a useful and/or relaxing space for your own enjoyment. And your timing could be spot on; a recent survey found half of empty-nesters of pre-retirement age are opting to stay in their family homes instead of downsizing.
“Retirement isn’t all about being practical,” notes Ken Dychtwald of California-based consulting firm Age Wage. “More and more people are turning their empty nests into nurturing nests.”
Even better, with today’s easy-to-use construction tools, repurposing rooms can be stress-free and efficient. If you haven’t engaged in DIY projects lately, it’s worthwhile to check out some of the newest market innovations in saws, cordless drills, portable nailers and belt sanders. One of the most consumer-friendly is the RotoSaw+ with Dust Vault attachment from RotoZip that can effectively custom-cut a variety of materials (including drywall) while reducing the dust and debris that is sure to be produced by any great remodel project by 90 percent.
Here are some DIY ideas for using such tools to repurpose your space:

*Private gym: Building a workout space right into your home should eliminate any excuses to avoid exercise. Features might include mirrored walls, storage space for gear, a sound system, extra ventilation and/or rubber floor tiles for acoustic control.

*Man or woman cave: This room could incorporate an endless array of hobbies specific to your interests including reading, watching movies, creating art, practicing music, playing video games or cheering on your favorite sports team.

*Guest bedroom: Now that your kids have flown the coop, you have more time to entertain friends, whereupon an appealing guest bedroom could be a boom to your social life. Another option is using space-saving furniture to combine a guest bedroom with a room that serves other purposes, such as an office or reading room.

*Walk-in closet: Multiple retailers now offer dream closet components like drawers, bars, shelves, mirrors and containers. Consider a vanity and/or benches for relaxing as you apply makeup, try on shoes and accessories and create the perfect outfit.

*Meditation room: Create a space to recharge yourself physically and mentally, perhaps with natural light, a sound system and elements of nature like plants, flowers and/or a water fountain. To achieve a Zen quality, minimal furniture and accessories are recommended. Pastels or dark colors are considered the most relaxing colors. Consider building a customized meditation table to work as the centerpiece of your room.

Your DIY remodeling project doesn’t have to be complicated. RotoZip offers three models of RotoSaws able to cut multiple surfaces while greatly reducing construction dust and debris. Call 1-877-ROTOZIP or visit www.rotozip.com for more info.

Details To Keep In Mind During Fence Construction

shutterstock_432755503“Good fences make good neighbors,” the saying goes.

The opposite is also true. As with any other type of construction, fence installation requires a certain amount of planning and consideration in order to minimize impact to the neighborhood. Here are a few things you should think about before you start building a new fence, which will help ensure that both you and your neighbors are happy with the result.


Apply for Your Fence Permit

Most municipalities, townships and counties require a permit for fence installation. Specific regulations and codes vary widely, so be sure you are clear on the requirements in your area before planning a fence.


Measure Your Property

Next, you’ll need to figure out exactly where your fence will sit. Normally, your fence installer will do the measuring. However, if your fence is on or near your property line (as most are), it’s very important for you to know exactly where your property lines are. If you don’t know, you will probably need to get your property surveyed. Also, if your fence will abut a neighbor’s property, you may need to get their permission before installing it.


Choose the Right Fence for Your Needs

A good fence is an investment. People often let price dictate their choice of fencing. However, keep in mind that a low price doesn’t always mean good value.

When you shop for a new fence, consider its purpose as well as your lifestyle needs. Do you need to contain pets and kids? Is privacy your aim? Or perhaps you need something for noise reduction? How important are aesthetics in this location? And how much maintenance do you want to commit to?

There are hundreds of different types of fencing available. Your answers to these questions will help narrow your choices and avoid being overwhelmed. Keep in mind that each type of fencing material has its pros and cons. Don’t be afraid to enlist the help of your fencing professional in choosing the best type of fencing for your needs.


Flag Your Utility Lines

Because fence installation involves digging, it’s very important that all underground utility lines be clearly marked before work begins. Normally your fencing company will contact the utility companies in advance. Utility workers will come out and mark your utility lines. (If your fence company doesn’t provide this service, you can do it yourself by calling 811 from anywhere in the United States, or by making an online request on call811.com two to three days before work begins).

Be aware that the utility companies will mark only their lines. If you have an underground sprinkler system, dog fence or gas line to a grill or outdoor fireplace, it’s your responsibility to mark these lines. It’s a good idea, too, to walk the property with your fencing installers and point out the lines before they go to work.


Trim Your Fence Line

Your fencing crew will need clear access to all portions of your fence line. That means clearing any brush or debris and/or removing trees in the way. It’s also helpful to mow any turf areas in advance of fence installation. If you are unable to do this yourself, be sure to inform your fencing contractor so it can include this work as part of the bid.


Prepare for Dirt Removal

Fence posts must be set fairly deep if you want a sturdy fence that lasts. This means you’ll end up with quite a lot of displaced dirt on your property. Consider how you want to handle this. Most fencing contractors will offer haul-away services. Otherwise, be prepared to show your installers where on your property you would like them to put the fill, and/or haul it away yourself.

Taking care of these few details will help ensure that your fence installation goes smoothly and without incident. Not only will you be happier with the result, but your neighbors are sure to appreciate it, too!


Chris Buenz is the owner of First Fence Company in Chicago, IL. With over 18 years of experience in both fencing and sales, Buenz is well versed in the Chicago area business market.

6 Simple Ways to Freshen Your Home Inside and Out

23752996_original(BPT) – Looking for some easy ways to breathe new life into your home? Whether it’s the air inside or the decor itself, freshening things up can make your home look and feel more welcoming at any time of year. You don’t need a lot of time or money to reinvigorate your home; just a few simple and affordable, yet high-impact DIY projects will do the trick.

Here are a few projects you can easily accomplish in a single weekend:

* Paint an accent wall, trim or ceiling. Decorators often say painting is one of the easiest and most affordable ways to freshen your home’s appearance. You don’t have to redo an entire room in order to leverage the freshening power of paint. Simply painting a single accent wall for a pop of color, using paint to create graphic wall art, or repainting the trim or ceiling will create a whole new look. If you’re looking for inspiration or simple solutions to help seamlessly transform your space, Dutch Boy Paint offers unique project ideas and easy-to-follow how-tos that will make the process a breeze.

Choosing the right paint for the job can also ensure the painting project is a breeze, from start to finish. Dutch Boy Refresh paint + primer with Arm & Hammer odor Eliminating Technology, eliminates the need for a separate primer. It saves time since you don’t have to take that extra step of priming first. Plus, it’s great for reducing common household odors. Refresh paint is a perfect choice for laundry rooms, bathrooms, kitchens, mudrooms and even kids rooms. It gives you added assurance that your home will smell fresh and clean.

* Don’t forget about your furry family members. You may love your pets, but the truth is they can contribute to a stuffy atmosphere in your home. Wash pet bedding, litter boxes and cloth toys regularly. Contain pet clutter by placing your pup’s or kitty’s toys in a pretty basket where he or she can reach them.

* Add some indoor greens. Plants not only make a room look bright and homey, their ability to filter carbon dioxide and other airborne pollutants can help make your home smell fresher, too.

* Give your kitchen some TLC. Like most, you probably spend a lot of time in your kitchen. However, you don’t need to do a complete makeover to give your kitchen a fresh look. Start by decluttering countertops and dropping some lemon rinds down the garbage disposal. Next, replace dated cabinet hardware with new handles, knobs and pulls. Adding in a faucet in a contemporary finish will go a long way too; as a focal point of the kitchen, it will help tie everything together in a subtle way.

* Upgrade your entryway. The front door is one of the first things visitors notice. If yours is old, worn and outdated, replacing it with a new one can be an easy, cost-effective way to improve the appearance of your home’s exterior. Even if your door is in good shape, painting it a bright, appealing color can make your home’s facade look fresher and more inviting. Be sure to use a paint formulated for doors, such as Dutch Boy Cabinet, Door & Trim paint. Add decorative lighting fixtures like sconces or a hanging light, dress up front steps with potted flowers and wash sidelights and windows around the entry.

* Some sources of stuffiness may surprise you. That old shower curtain not only makes your bathroom look shabby, it can detract from the air quality in the room as mildew builds up over time. Replace old shower curtains with something bright and appealing, and be sure to clean the grate on the bathroom vent fan. Stuffiness hides in the laundry room, too. Cleaning dryer vents and the washing machine regularly, and keeping laundry items and accessories organized can help make even a small laundry area feel fresh.

Freshening around the home doesn’t have to be a seasonal project. With a few simple steps, you can create a new look and feel in and around your home at any time of year. For more on these products and inspiration for your next paint project, visit www.dutchboy.com

The Rise of the Basement: Top Tips for a Better Space

30057755_original(BPT) – With fewer homes for sale and good returns on the remodeling investment, more homeowners are reclaiming their lower levels and remodeling their basements.

Basements are coming out of hiding these days. And they’re doing it in style, with before-and-after transformations featured everywhere from HGTV to Pinterest and YouTube.

What’s driving this trend? A tight housing market, for one thing. With houses at a premium – and a proliferation of DIY how-to’s – more homeowners are inspired to reclaim their unused space and expand their living area.

A smart, affordable upgrade

Updating your lower level is a sound investment in your home. Remodeling magazine’s 2016 Cost vs. Value Report put the average basement remodel at $61,303, with a 70.3 percent payback – a far better investment return than adding a bathroom or garage.

Props for Your Property Value

Depending on local regulations, the additional space can often be added to your home’s total square footage, making your market listing more appealing to buyers and potentially increasing your property value.

To recoup the most from your remodeling efforts, make sure your design and decorating choices are attractive and functional – not too quirky or customized.

Look Up, Look Down: Banish Water All Around

Before you begin making decorating choices, tackle any needed repairs, including waterproofing your lower level. It’s a good idea to seal your walls and floors first, and important enough to hire a professional if you’re short on time.

And since below-grade spaces are usually cool, humid and prone to water damage, consider investing in a good dehumidifier and choosing moisture-resistant products.

Elevate Your Ceiling Style30057583_original

Ugly or damaged ceilings can ruin the look of your newly updated basement space, so take steps to repair or replace your ceiling. Plaster any cracks and replace yellowing tiles.

If you’re updating the ceiling, look for products from companies like Armstrong Ceilings that are specially treated to resist the growth of mold and mildew. From there, the sky – or the ceiling – is the limit. Savvy design choices, like coffered ceilings, or wood planks add style and the results are easier to achieve than most people think.

Stuck with an older, 2-foot x 4-foot dropped ceiling grid? There’s no need to suffer without style. Homeowners can take advantage of today’s beautiful new 2-foot x 2-foot ceiling tiles by adding 2-foot cross tees to their existing grid systems.

Make sure your flooring choices stand up to moisture, too. Patch any cracks in the concrete floor and consider adding a subfloor if the surface slopes or is uneven.

Many homeowners gravitate to the warmth and soundproofing effect of carpeting in basements. Low-pile or Berber carpets resist wear and are inexpensive options. A moisture-barrier pad between the carpet pad and the carpet adds another level of water resistance and reassurance.

Now is a great time to finish your basement. You’ll enjoy the added living space now, and likely realize a healthy return on your investment in the future.

Tips for Creating a Virtually Self-Cleaning Bathroom

23015586_original(BPT) – Americans may be spending less time on housework, but that’s probably not much consolation when you’re scrubbing the toilet for the third time in a week. Meanwhile, hours spent working are taking more of our time, according to data from the Bureau of Labor Statistics’ American Time Use Survey. Factor in other time demands like taking care of the kids, your in-laws, your spouse and yourself, and it’s easy to see why products that improve cleanability are gaining ground in bathroom design.

Fortunately, elbow grease and harsh chemical cleansers are no longer the only ways to keep a bathroom clean. Today, a variety of bathroom fixtures, devices and construction materials can all help contribute to a bathroom that cleans up with less effort from you and stays that way for longer.

Innovative Fixtures and Faucets

Cleaning the toilet, tub and shower probably doesn’t top anyone’s list of favorite tasks. While it’s still necessary to do regular deep cleaning, when it comes to daily maintenance, a range of new bathroom additions can lend a hand.

* Self-cleaning toilets – Even in the cleanest households, the toilet can be a hotbed for a variety of unpleasantness. The new ActiClean self-cleaning toilet from American Standard can make day-to-day cleaning of the bowl a much easier task. The press of a button releases cleaning solution into the bowl for either a one-minute quick clean or a 10-minute deep clean, while the patented VorMax jetted flushing technology powerfully scours the bowl to remove all splatter, skid marks and clinging waste. At the end of the soak period, the unit automatically siphons away the cleaner and rinses the bowl with clear water. Simply press a button, walk away, and let the toilet do the rest – it’s that easy.

* Smarter showers – Sure, you can find high-tech, high-cost showers that keep shower doors spotless through nano-technology that repels dirt and water droplets. But having an easy-to-clean shower can actually be simpler and less expensive. It starts by choosing the right materials and design. For example, traditional shower doors are notorious for building up mold, mildew and grime in door tracks. Frameless shower doors can eliminate that problem. If you hate mold in tile grout (and who doesn’t?) you have numerous options. Tile your shower with a dark tile and dark grout. Or, opt for tiles made with mildew-resistant coatings. For super-easy cleaning – not to mention leading edge design – you can even choose a concrete shower.

* No-touch faucets – The bathroom faucet is the most touched area in a bathroom, which means it can also have the most germs. After all, everyone touches it right after using the toilet (you hope). Touchless bathroom sink faucets can help reduce the spread of bacteria and germs, since no one needs to touch them to turn them on. Plus, their hands-free operation ensures that the faucet stays free of fingerprints, soap scum and toothpaste splatters. A wave of the hand starts the faucet — and you’re on your way to a tidier, maybe even immaculate, bathroom.

23015470_originalCleaner Construction

Of course, if you’ll be renovating a bathroom or building a new home, the best way to ensure a cleaner bathroom at the get-go is to start with construction materials that promote cleanliness. Mildew resistant tiles and grout, mold-resistant paint, and solid surface countertops can all add up to less cleaning time down the road.

One of the most important features to incorporate into a bathroom to help keep it fresher and healthier is an exhaust fan. This will not only remove unpleasant odors from the bathroom, it will also vent moisture out of the room from steamy showers and baths. Excess moisture in a bathroom is one of the leading causes of mold and mildew, which can be unsightly, smelly and unhealthy.

Yes, you can achieve freedom from cleaning. By installing easy-to-clean bathroom fixtures and materials, you can invest less time, effort and energy keeping the room clean. Unexpected guests – drop in unannounced at any time!

Prepare Your Home for Winter With These Smart Home Improvement Projects

23163936_original(BPT) – Fall is here, and with it, cooler temperatures. Home renovation experts suggest now is the ideal time for homeowners to prepare their home for winter and think about home improvement plans that they can complete during the fall months.

When it comes to home improvements, building experts recommend homeowners carefully consider and prioritize their plans by looking at structural improvements over cosmetic upgrades.

Fundamental for homeowners hoping to invest smartly in their home is understanding what improvement is deemed essential and what is considered purely cosmetic. For example, a home’s “skin” is a key investment area during a renovation project. Hiring an energy inspector to examine your home will give a better sense of the required work and avoid any subsequent costly headaches.

If you’re thinking of going green, small changes such as using compact fluorescent light bulbs can contribute to reducing your home’s carbon footprint. Fluorescent light bulbs typically have a longer life and use less energy thereby reducing excessive energy waste as well as monthly energy bills.

Investing in energy efficient appliances is another effective way to live green and add value to your home. Homeowners with an old central air system can consider having a new, more energy efficient HVAC system installed. While these may come with an expensive up-front cost, the savings on energy bills over the long-term will prove to be a wise investment. Additionally, the inclusion of other energy efficient appliances such as refrigerators, washing machines and dryers will contribute to lower energy bills.

Another significant way to reduce energy consumption is to adequately seal the home to stop any air leaks by considering a smart insulation material. Insulation experts homeowners should survey their house from top to bottom, and assess any trouble spots such as drafty areas or cold zones which could be caused by air leakage. Air leakage can limit the effectiveness of heating systems. According to spray foam insulation manufacturer Icynene, floors, walls and ceilings can account for up to 31 percent of air leakage in a home. Spray foam insulation, which can help combat air leakage, is growing in popularity among homeowners since it is an energy-efficient material that delivers year-round benefits. Spray foam insulation, like that available from Icynene, works well in all types of homes across the country, regardless of climate.

Spray foam insulation performs for the life of the property, ensuring that homeowners can enjoy comfortable indoor temperatures year round without overrunning their heating and cooling equipment. According to Icynene, high performance spray foam insulation can noticeably reduce monthly heating and cooling costs. Additionally, spray foam insulation helps minimize random airborne moisture and pollutants from entering the home, which is ideal for allergy sufferers.

Icynene recently released a comprehensive home insulation mobile app, available on the Apple App Store and Google Play Store, to allow homeowners understand where air leaks can occur in their home as well as how a modern insulation material like spray foam can help make a difference and why it is a smart home improvement investment.

More information about Icynene spray foam insulation can be found at Icynene.com.

10 Smart Ideas to Heat Your Home for Less

23547343_original(BPT) – As cooler temperatures begin to sweep the nation, homeowners are turning on their heat for the first time in months. With every degree increase on the thermostat, utility bills follow suit.

A warm, comfortable home shouldn’t cost you a small fortune. Luckily, there are some simple strategies for combating the chill while lowering heating costs at the same time.


Change the Filters

The summer and fall months are a prime time for airborne allergens and microbes, which can clog furnace filters and inhibit airflow. This makes your furnace work harder and in turn, costs you more. Change your filters monthly to help open airflow and save money.


Embrace the Sun

Want to help heat your home for free during the winter? Pay attention to the sun. Try opening curtains on south-facing windows and the radiant heat from the sun will help naturally heat your home. Just remember to close them at night to keep out the evening chill.


Use a Programmable Thermostat

You can save up to 10 percent a year on heating and cooling by simply adjusting your thermostat 7-10 degrees Fahrenheit for 8 hours a day, according to the U.S. Department of Energy. Use a programmable thermostat to change the temperature for time periods you are sleeping or away from home. Some air conditioning systems can be controlled remotely through a smartphone app like “Smart AC,” which works seamlessly with LG duct-free systems, allowing the homeowners to wirelessly connect, control and monitor the temperature through an easy-to-use smartphone app.


Consider Installing a Duct-Free Mini-Split System to Provide Zoned Heating

Instead of moving air through ductwork as central heating and air conditioning systems do, duct-free systems deliver warm conditioned air directly into a room. Duct-free systems like those from LG provide high-performance zone heating, allowing homeowners to keep their bedrooms toasty warm at night when it’s frigid outside, while turning the heat down (or off!) in the rest of the home to help save energy.


Clear Heat Registers

One common mistake homeowners make is covering heat registers with furniture, toys or other items that block the heat flow. To improve heating efficiency, inspect all heat registers in your home and remove anything that’s blocking them.


Seal Leaks and Lock Windows

Phantom heat loss is a huge energy drain. Test for leaks by using a flashlight to see if light filters through cracks or try pulling a dollar bill through. Then, seal air leaks around utility cut-throughs, chimneys and recessed lights with spray foam. Use caulk and weather stripping to seal windows and doorway drafts. Don’t forget to close and lock windows and doors. Locking pulls the components tight against the weather-stripping to block cold air from entering the home.


Consider Installing an Energy Star Certified Heating System

Energy Star certified energy-efficient products provide superior performance while saving energy to help lessen the impact on the world around us. The EPA Energy Star program identifies heating and cooling products that are energy efficient and can save you money.


Use Your Fireplace Wisely

The warmth and ambiance of a wood-burning fireplace are hard to beat on a chilly day. But to ensure you don’t lose valuable heat when the fireplace is not in use, always remember to close the damper when the fire is completely out.


Fill Attic Insulation

When was the last time you checked your attic’s insulation? Heat rises – so if you don’t have proper insulation in your attic, you’re losing money. Start by checking to make sure insulation is evenly spread throughout your attic. Then, visit energy.gov/energysaver/insulation to learn recommended insulation amounts for your region.


Lower Your Water Heater Temperature

Water heating accounts for about 18 percent of the energy consumed in your home, according to the U.S. Department of Energy. Consider setting your water heater to a lower setting of 120 Fahrenheit and you’ll still enjoy hot showers without a utility bill that will scald you.

Refresh Your Home with 6 Easy DIY Paint Projects

23753150_original(BPT) – Few things are as satisfying as pulling off a DIY project, especially when the results are successful. Whether you’re looking to refresh something old or create something new, there’s no need to hire a professional. Updating your home both indoors and out can be effortless. All you need is a fresh coat of paint.

Whether a quick afternoon project, or a weekend makeover, here are some DIY projects to spark your inspiration:

Update Your Bedroom

You can change the entire look of your bedroom with a can of paint and a few easy steps. A splash of vibrant color could be just the change you’re looking for. But paint isn’t just for the walls. Take your old desk and chair set from abandoned to astonishing with a little paint from HGTV HOME(TM) by Sherwin-Williams for the perfect study corner, or add a coat of your favorite color to every piece of furniture in the room. For this project, try HGTV HOME by Sherwin-Williams Showcase Interior Paint. This paint was created with a Precision Color Promise and features exceptional color matching with fade resistant technology allowing you to choose the perfect color to revamp your space with confidence.

Paint a Picture Frame

Gallery walls are super trendy these days, so why not make yours even more stylish with a personalized touch? Refresh those old picture frames you have lying around, or pick some up at a thrift store and add a layer of paint. Just be sure to wipe off your frames first so the surface is clean and ready for brush strokes. After the frames are dry, slide in photos and they’re ready to hang.

Two-Toned Accent Wall

When it comes to creating an accent wall, the possibilities are endless and the quickest and easiest way to make a huge difference in any room. A subtle hint of color can elevate even the plainest of rooms in just a couple of hours. A two-toned wall is an unexpected twist that takes any room from bleak to bold with high-quality paint.

Select two hues from one of their 16 unique Color Collections. Each of the paint colors in the collections were designed to work together in harmony, so you truly can’t go wrong! Then line the wall with painter’s tape and roll on the first color. Let it dry and then apply the other. Once paint is dry to the touch, slowly pull off the tape, angling it toward you.

Try using HGTV HOME by Sherwin-Williams INFINITY Paint for this project. This interior paint provides a durable finish that is stain resistant and can easily be washed and cleaned, making it the perfect paint for any room in your home.

Instant Curb Appeal

Ready for the fastest and easiest ways to improve your home’s curb appeal? Give your front door, trim and shutters a fresh coat of paint. Pick a bold color (or colors) or a brightening white, but make sure they complement the other colors of your home. These simple painting projects will give your home that nice finished look that will have neighbors stopping and staring as they stroll by.

You’ll also need a paint that provides protection against even the toughest elements, such as heavy rain and intense sunlight. HGTV HOME by Sherwin-Williams offers a wide variety of paint products that do this, especially their Showcase Exterior Paint with WeatherTuff technology. This paint also offers a thicker coating for extra protection from cracking, peeling and blistering for a long-lasting beautiful finish.

Upgrade Your Mailbox

Dress up your mailbox by painting the wooden post to match the exterior of the home. Or take a bold approach and paint it a vibrant color!

Picnic Table Revamp

Shatter picnic table stereotypes by painting yours with a cheerful color. After all, a picnic table doesn’t have to be brown. Start by cleaning the table with soapy water to remove dirt and grime. Next sand the table, so the surface is free of splinters. Then rinse the dust away. Let the surface dry, and then it’s time to paint with a premium quality exterior paint that’s perfect for unprimed surfaces, like HGTV HOME by Sherwin-Williams INFINITY Exterior Paint. This paint is a one-coat paint and primer making it easy to update your picnic table in just an afternoon. It’s also mildew resistant and holds up against harsh weather conditions, keeping your picnic table bright and beautiful throughout the entire year.

Feeling inspired to revitalize the look of your home? Get started this weekend with any of these quick and easy DIY paint projects. Visit www.hgtvhomebysherwinwilliams.com for even more inspiration!

5 Ways to Prepare Your Outdoor Living Space for Fall

23720835_original(BPT) – While everyone eagerly waits for spring each year and wishes summer could last a month or two longer, when it comes down to it, fall just might be America’s favorite season. It’s warm but not hot, the air has that clean crispness that’s hard to describe and perhaps the biggest draw, pumpkin-flavored everything. And let’s not forget about all those bright, beautiful leaf colors that come with the change in weather. So why start shutting down your outdoor living space with the first sign of fall?

Packing it in early is something dynamic design duo, Colin and Justin, would never consider. The home improvement stars of “Cabin Pressure” and “Game of Homes” make the most of their beautiful Western Red Cedar deck all year around.

“Oh my gosh every single day, we’re on the deck – whether it’s summer, spring, fall, winter or whatever,” says Justin. “A deck isn’t just for three months of the year; a deck is what you want it to be. And if you love the great outdoors as much as we do, you can make it work.”

Here, then, are Colin and Justin’s top five design solutions to help extend your outdoor living well into the autumn months:

Start With the Right Deck

Just because you procrastinated, doesn’t mean you need to wait until next spring to build or start designing a show-stopping deck. Whatever your plans, though, one thing almost everyone agrees upon is that there’s nothing quite like the rich, textural warmth of a Western Red Cedar deck to create a beautiful all-season outdoor living space. Low maintenance, surprisingly affordable and easy to work with, Real Cedar can’t be beat.

“We recommend getting your big ticket items first, around which you can seasonally adjust and tailor your look with different smaller and more affordable purchases,” says Colin. “And with decks, it’s worth investing in a really good product to start with like Western Red Cedar, which will last and last and last. Honestly, it just gets better with age, improving as the years pass, and it really is a showstopper.”

Screen It In

Unless you’ve got a screened-in porch, you may still have to shield your outdoor living space from the occasional nippy breeze. For Colin and Justin, this is easily rectified with movable wicker screens that they store inside during the summer months.

“They’ve got a lovely weighty bottom to them,” says Justin. “The wind passes right through them and that’s a good tip for anyone using freestanding screens on the outside. If they’re too solid, the wind can catch them. But if they’re fretwork or open panels or cutout work, they’re good.”

Heat Things Up23720743_original

Paradoxically, as the days grow shorter, you’ll wish they would last longer. There’s no more perfect way to cap off a perfect fall day than by sitting around a fire with friends and family.

“In the autumn, we have two propane operated fire bowls that sit smack dab in the center of our Western Red Cedar deck,” says Colin. Their gas-powered fire is safely contained in a stone bowl and leaves no ashes or embers. “And those fire bowls help us stretch out our summer a little bit. We also have two big patio heaters, which we can direct inward at either end of our terrace and they really make a big difference.”

Bundle Up With Textiles

Sometimes all it takes to warm up your outdoor living space is some simple, yet chic, soft furnishings and yes, maybe even a change in wardrobe. (But don’t worry – you don’t have to say good-bye to your beloved flips flops, just “until we meet again next spring.”)

“We take out lots of really lovely textural throw pillows and rich woolen blankets – think Pendleton and Hudson’s Bay striped blankets – and we cozy up,” says Justin, adding, “And don’t forget your winter woollies. When the weather is changing, sometimes it’s less about what you add and more about what you put on in terms of clothing.”

Install a BBQ Cover

If you’re like Colin & Justin, you enjoy the thrill of the grill year round. This is where an easy-to-build, Real Cedar BBQ Cover really earns its keep. Made from nature’s most resilient building material, this sturdy and beautiful structure is going to last you a very long time. Just think of all the cookout possibilities!

“We BBQ all the time,” says Colin, “So we got a cover. That way we don’t have to worry about weather.”

For free downloadable project plans, visit RealCedar.com or for more fast facts on building with Real Cedar, download their free DIY app – available on the Apple App Store for iOS and at Google Play for Android.