(BPT) – When spring arrives, will your deck be ready for “primetime?” Or will it still be wearing the shabby remnants of last season’s look? Clunky,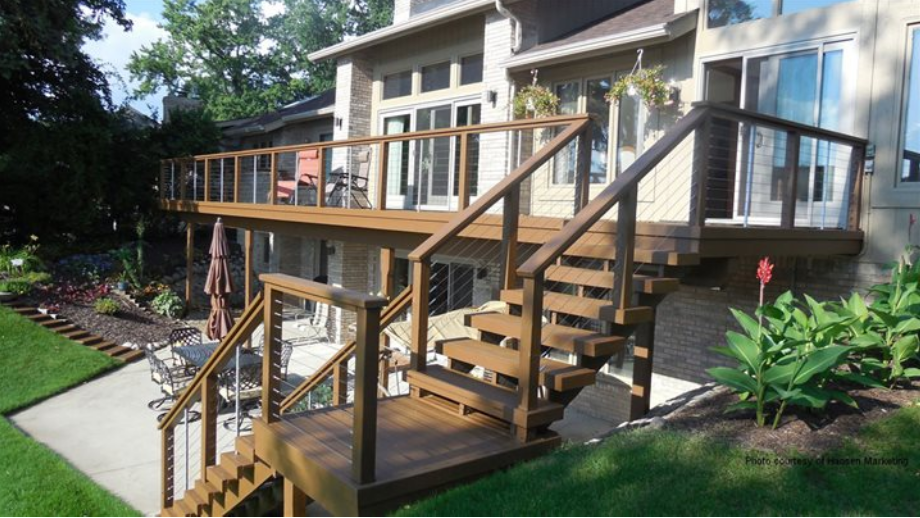 view-blocking railings, a rectangular layout and dark stain are so last decade. Before warm weather gets here, consider upgrading your outdoor living space with the trends that every well-dressed deck will be wearing this year.
Cable railing = better views
Whether you’re lucky enough to live on the water or you spend a lot of time keeping your backyard green and blooming, wouldn’t it be great to be able to enjoy the view from your deck? Traditional wooden railings can block your view, and glass can be hard to clean.
More view-seeking homeowners are replacing wooden balusters with Ultra-tec stainless steel cable railings. Do-it-yourself kits from manufacturers like The Cable Connection make it easy to replace old balusters with stainless steel cable, creating a sleek, upscale and view-friendly look. The cable can be used with wood, metal or sleeved posts with a solid core, and you can retrofit any railing with the cable. Whether your deck is made of wood or composite, cable railing works wherever you would install a traditional railing, including the deck perimeter and stairs. Visit www.thecableconnection.com to learn more.
A deck of a different color
Clear sealant for a natural look or subdued rustic hues have long been the colors of choice for decks. This year, expect to see a plethora of fresh colors popping up on decks. While changing the color of a wooden deck from a darker hue to something brighter may be problematic, composite decking manufacturers have branched out into a variety of brighter colors, including whites and light grays. You’ll even see pops of color like greens and blues in designs and inserts set into decking planks.
You can also add color to your deck through plantings. Think outside the planter box – and traditional floral plantings – to mix things up with decorative grasses and leafy foliage that will splash color around your deck throughout the summer.
Mixed media ups interest
Wooden planks, wooden railings, stairs and even furniture – long gone are the days when decks were single-material constructions. Today’s decks are a study in mixed media, incorporating traditional materials like wood, brick and tile with modern elements such as composite planks, cable railings and even ceramic tile.
The amalgam of materials can yield a multitude of patterns, styles and looks. Pair a traditional wood deck with cable railing and stairs that descend to a patio of pavers set in a herringbone pattern. Use heat-resistant ceramic tile to create a decorative and functional cooking area on a composite deck. Varying the materials used in your deck adds visual depth, interest and excitement to your outdoor living space.
On the lighter side
Outdoor lighting isn’t just for the purposes of safety, or to extend the deck’s usability well into the night. Lighting can be a design statement and a powerful decorative element for your deck.
Decorative post caps can add a designer look to railings while also providing ample light for outdoor activities. Inset lights create mood and ensure safe footing on stairs. For a soft, glowing effect, tuck rope lighting beneath upper and lower railings. Don’t forget the beauty of natural light, too; fire pits and chimineas offer up warmth, ambience and gentle light.
With some designer touches, it’s easy to turn your deck from dull to delightful – and ensure your outdoor spaces stay in step with today’s best-dressed decks.