4 Ways to Get the Character of Historic Window Architecture in a New House

2(BPT) – History tends to repeat itself.

The saying, “The more things change, the more they stay the same” rings true with architectural styles. We have smarter ways of building, and the layouts have evolved with lifestyle changes, but historical and authentic design is only growing in demand.

“Post-war in the mid to late 20th century, many homes began losing that historical European influence due to the need for mass produced, affordable housing,” says Deryl Patterson, an award-winning residential architect and president and founder of Housing Design Matters, Inc. “Fast forward 30 years, and homebuyers began demanding those historical styles again—with the convenience and functionality of a new home.”

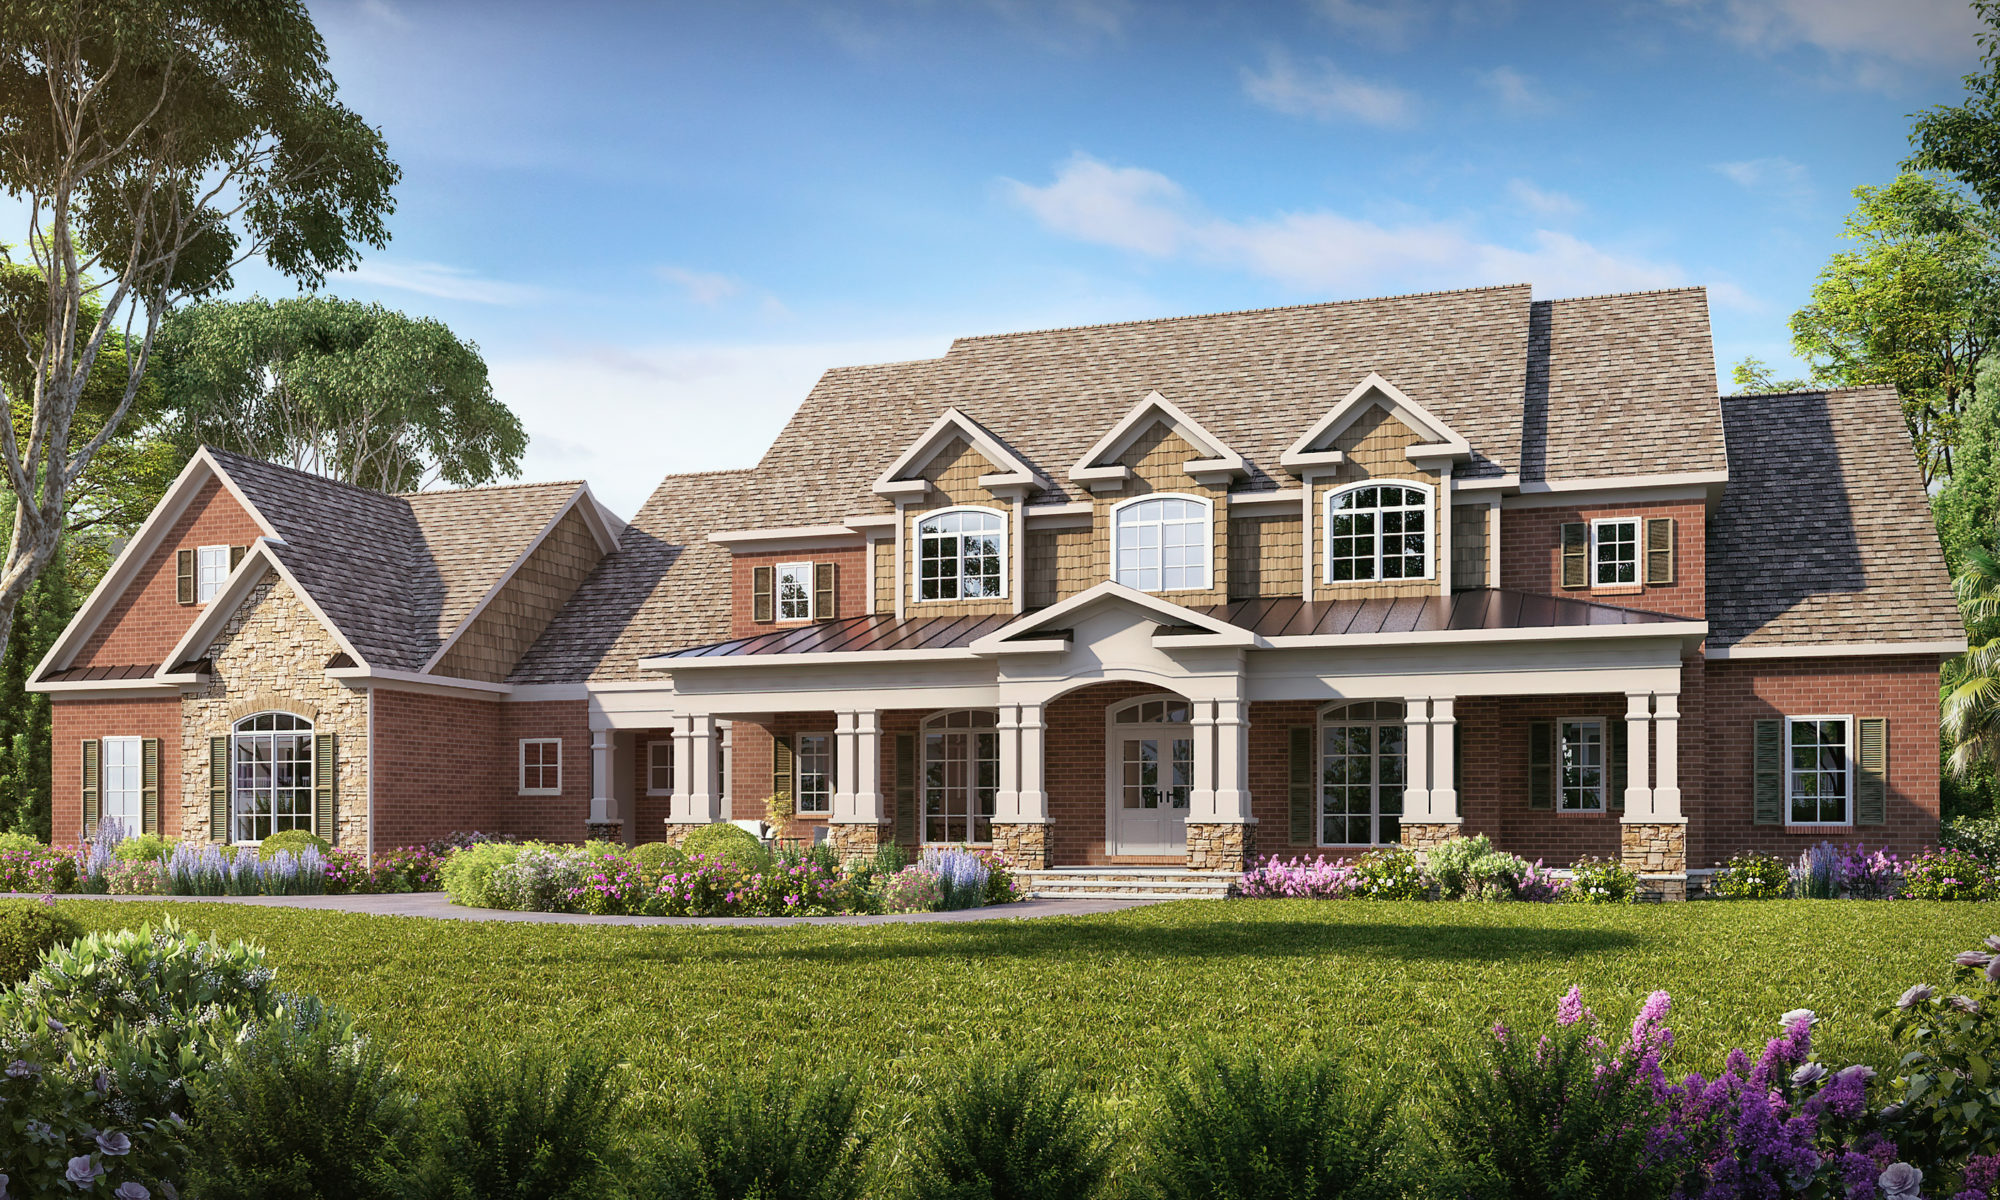
“One of the features often overlooked when designing a ‘new old house’ is the window style,” says Mark Montgomery, vice president of marketing for Ply Gem Windows. “Instinctively, people realize the curb appeal of a home is not quite right when the windows do not fit the architectural style, but they can’t point out what’s wrong. Windows are so much more than white rectangles and can really make or break the home’s design.”

For homebuyers who want an authentic older home look, the exterior must be designed in a specific manner, down to every little detail, especially the window architecture. Montgomery advises buyers to consider the color, grilles (decorative pattern that can simulate the look of separated glass panes), operating style and shape for historically-influenced design that complements the home’s style.

To get the look, here are four examples of how history influenced window architecture in home design:

1. French Country: This is a very elegant style, focusing on vertical proportions. Windows are a defining characteristic that should emphasize this. A 3-foot by 6-foot window with a two-over-two window grille pattern is a classic combination. The single vertical mullion (a post that separates two windows) in the window further reinforces its striking proportions.

2. Modern Tuscan: Windows play a vital role in the design. Imagine them as geometric forms, creating interesting patterns across the front of the home. Consider combinations of single hung and fixed glass windows. The windows should be relatively free of grilles – perhaps a simple single vertical or cross pattern – to keep the style fresh. If the budget allows, consider upgrading to a Ply Gem MIRA Series window and using one of the bold, saturated tones, available in nearly 50 different colors.

3. Craftsman Bungalow: This style was developed from the British Arts and Crafts movement and features double-hung or casement windows. In Craftsman-style homes, the exterior trim traditionally contrasts with the window frame color, and the windows include grille patterns that create vertical proportions.

4. Prairie: A bold departure from the typical European-influenced styles, windows in modern Prairie architecture are typically tall casements in warm tones, providing the perfect complement and contrast to the horizontal lines of the style. A Prairie-style grille pattern is essential to complete the look.

To find the window style that best fits your “new old house,” Patterson recommends researching the options.

“One of the best ways to find inspiration is to drive through older, historical neighborhoods. If you don’t live close to such neighborhoods, old travel magazines and history books are also great resources,” she says.

Websites like www.plygem.com also help provide inspiration and take the guesswork out of architectural styling and color selection through historically accurate visual renderings, window design specifications and suggested style and grille patterns.

Top Tips For A Safe Yard

Hurst Photo via ShutterstockOnce winter ends, all your kids will want to do is go outside and soak up the sunshine as they play in the yard. Before they do though, you’ll need to make sure that your yard is perfectly kid-friendly — and that means ensuring that it is a safe place for them to play.

However, kids will likely get into everything. After winter, your yard may be filled with lots of little hidden dangers that will result in cuts, scrapes and bruises — or worse. Here’s a look at how to kid-proof your yard after a long winter.

First, Do Some Serious Cleanup

Wintertime is notorious for causing trees and shrubs to shed branches, and if your yard is close to the road, you may find cans, bottles, bottle caps or even nails hidden in your yard. In addition, trees and shrubs may have branches sticking out where an unsuspecting child can run into them.

This means that the first step to making your yard safe is to clean it. Pick up all the branches and debris that you find, then give the grass a thorough raking to remove dead leaves, and smaller objects like nails, stones and broken glass. Once that is finished, prune trees and shrubs to remove broken branches or branches that are sticking out too far. For the final step, do a thorough search for pipes or wires that may have become exposed during winter. You might not find these immediately, but your kids almost certainly will!

Remove Hazards

If you have a pile of leftover firewood from winter, or even a stack of lumber from a construction project, make sure that it isn’t near your children’s play area. Kids love to climb on piles of firewood and lumber, which puts them at risk for anything from a splinter to a serious fall if the woodpile collapses. Woodpiles also tend to attract all sorts of critters, including rats, mice, spiders and snakes — some of which can be dangerous.

Fix Play Equipment

Winter weather is harsh on outdoor equipment. Wooden playground equipment, for instance, is highly prone to developing splinters — large, long splinters that could require medical attention. Make sure to inspect wooden outdoor equipment, and if necessary, remove large splinters by hand.

The same goes for metal and plastic. Wet winter weather and freeze-thaw cycles can cause rusty edges or shattered plastic. Plastic may need to be replaced, while rusty items can often be repaired by removing the rust and then painting over the affected areas with a quality metal enamel.

Search for Poisonous Plants

Once the greenery starts to grow again, you should most definitely search your yard and garden for any plants that are known to be toxic or poisonous. Even if you keep a perfectly manicured yard all year, some of these plants can invade your lawn through seeds that birds have carried from nearby areas.

Be sure to rid your yard of poison ivy, oak and sumac if they appear. Across the southern half of the United States, you may find a pretty flower known as Datura, which is actually a powerful and deadly hallucinogenic if ingested. In other parts of the United States, you’ll find pokeweed, which is a plant that produces edible-looking berries that are highly poisonous. Familiarize yourself with dangerous plants in your area, and then remove them when you find them.

Use Rubber Mulch in Play Areas

Under swing sets, play equipment, and in or around gardens that your children are likely to play in, be sure to put down mulch as a soft barrier that will prevent your children from getting hurt if they fall. What mulch should you choose? Woodchips are full of splinters and sometimes toxic chemicals, depending on how they were processed. Sawdust and sand can get into the eyes or in the case of sawdust, spark allergies.

If you’re looking for a safe, nontoxic option, try rubber mulch. Schools and playgrounds tend to use rubber mulch because it provides a soft, safe play surface. In addition, several studies, including a study by the Environmental Protection Agency in 2008, proved that rubber mulch was nontoxic and harmless for children.

Once you’ve done all of these things, you can be reasonably certain that your yard will be safe for the kids. However, as previously noted, kids are known for getting into everything, so don’t discount their natural ability to get into trouble even in a perfectly safe yard!


Author Bio:

Penny Klein is the owner of Perfect Rubber Mulch (perfectrubbermulch.com). She has extensive experience in the industry, understands the best product fit for her clients’ needs, works with customers to guarantee the right amount of product is purchased, and makes certain the delivery process is best in class.

Protect Your New Plumbing System: Just Say No To Drano

spartan-plumbing-blog-postIf you recently purchased a new home, you will obviously want to do everything you can to protect that investment. This goes for the areas of the house you can see as well as those that may not typically be top of mind — such as your plumbing. In order to protect your pipes as effectively as possible, never use a harsh chemical such as Drano. These are just a few of the reasons why, as well as some alternative methods of cleaning your pipes that will keep them as safe as possible.

Why Drano is a No-Go

One of the easiest ways to damage plastic pipes is to use Drano or a similar product. The reason is simple: The chemicals in harsh cleaning agents will quickly start to eat away at them.

If you use these types of products on a regular basis, they can even start to cause metal pipes to corrode. This is especially the case if you have a particularly stubborn clog that does not clear after using Drano, Liquid-Plumbr or something similar. The chemicals will remain in your pipes, slowly eroding them over time. If you have this type of clog, call a professional to have it removed for good.

Toilet Clogs and Drano — A Damaging Combination

A lot of homeowners make the major mistake of trying to use Drano to clear a toilet clog. Even the makers of the product recommend against it, because its caustic chemicals can do a lot of damage. Drano’s oxidation process can clear a clog, but it can also create a great deal of heat inside the toilet bowl. The tougher the clog, the longer the chemical will continue to generate heat. This can lead to a toilet bowl crack that is so severe you will need to replace the entire unit. In some extreme instances, Drano use in a toilet has led to damaging explosions, requiring the replacement of not only the commode but other substantial repairs as well.

Drano could even cause an injury if it fails to clear the clog. Many people have become so frustrated they have tried using a plunger to get rid of an obstruction not thinking about the fact that the caustic chemical is still in their toilet bowl. As a result, water containing Drano can easily splash and burn the skin.

What are Your Options?

You will be much better off using a flange plunger or a toilet auger (also called a drain snake) to try and clear a toilet clog. A flange plunger, which is shaped similar to a bell, is specifically designed for toilets. Stay away from the traditional cup-shaped plunger, because that is made for sinks and other flat surfaces.

A toilet auger is a coil that extends down the toilet to push a clog down the drain so it can be flushed through the sewer line. The drawback to this approach is that most augers from your local hardware store will only go a few feet. If the obstruction is farther down the line, then you will need to call a professional plumber.

If you do not have either a flange plunger or a snake, there are still far better alternatives to Drano. For example, try using dishwashing soap and hot water to clear a clog. Here’s how to do it:

  • First, pour a small amount of dish soap (about a teaspoon should do it) into the toilet bowl and let it sit for approximately 10 minutes.
  • Get a small pot, fill it with water, and put it on the stove to boil. Just make sure it does not come to a complete boil, because that could damage the toilet bowl. Take the pot off the stove just before the water begins to bubble.
  • Pour the hot water into the bowl, making sure it goes in with enough force to loosen the clog. Pouring from about waist-high should do the job.
  • If the obstruction does not clear, let the soap/hot water mix soak for 10-15 minutes. If that doesn’t work, try the process again. If the obstruction still won’t clear, call a plumber.

In some instances, a mixture of baking soda and vinegar can also be effective. Remove some water from the bowl, pour in a half box of baking soda and a bottle of white vinegar on top of that. Let the mixture bubble for 30 minutes and gradually add some hot water. Repeat the process until the drain is gone.

Whatever solution you try, just remember to always steer clear of harsh chemicals. If a clog simply will not dissipate, call a professional to get rid of it for good.


Patricia Bonacorda knows from first hand experience the effects of homeowners using Drano. As the President of Spartan Plumbing a plumbing and HVAC company, she has assisted all types of businesses and residential homes since 1964. Spartan is a licensed, bonded and insured business that provides professional plumbing, heating and air conditioning services.